Mon Beau Jardin Blog Tour

Welcome to my stop on the blog tour celebrating the latest collection from Nadra, the very talented designer, quilter, teacher from the blog Ellis & Higgs.

Mon Beau Jardin Blog Tour Image

The Mon Beau Jardin collection is Nadra’s fourth with Penny Rose Fabrics and my first opportunity to work with one of her collections. Nadra use of colour with her beautiful floral designs has been a huge inspiration to me in the past and even more so with her latest collection.  You can see all the sweet details of each and every print on Nadra’s blog here.

Processed with MOLDIV

The collection was inspired by Nadra’s new found love of gardening and I adore the way Nadra has combined candy colour hues with pretty floral prints and classic stripes.

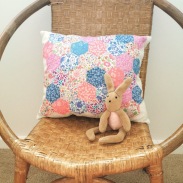
I choose to create with the pink prints from the collection and wanted to showcase the pretty designs (especially those sweet butterflies) as much as possible.   I used hexagon papers from Tales of Cloth and created a supersized hexie flower cushion.  (Nadra’s designs are the perfect size for fussy cutting 1 inch hexies!)

This project was insipired by youngest daughter learning to read and needing a special little reading spot just for her.

Processed with MOLDIV

Processed with MOLDIV


The sweet butterflies, candy coloured hues paired perfectly with a red dotted cot sheet which I wanted to incorporate – a little reminder of when we used to read to her when she was a baby.  I then hand quilted the cushion using Aurifil thread in 12 weight.


Processed with MOLDIV


With the leftover fabric I couldn’t help but make one of See Kate Sew’s pencil pouch with a bow. It’s a free pattern on her blog and is as fun to make as it looks.  It was the perfect way to use the last pieces of prints because not only is my youngest learning to read she’s also learning to write!

Processed with MOLDIV

I feel very honoured to help celebrate Nadra’s collection Mon Beau Jardin and can’t wait to see how it inspires Jennie next at week on her blog Clover and Violet.  It’s also definitely worth having at the previous bloggers projects.  They include Amber from the Gigi’s Thimble Blog sweet baby quilt and Jemima from the Tied with A Ribbon blog’s adorable unicorn cushion and bag.  All super sweet but super different ways of using the collection!

Happy sewing

Ange


English Paper Piecing Basting

Kingfisher Stitch Along

I am so excited to be a guest poster for Kingfisher Stitch-Along!  The stitch along is a wonderful initiative by Rachel of Stitched in Color and Jodi of Tales Of Cloth that combines english paper piecing, appliqué and traditional piecing.  For more details about the stitch along have a look at their Kingfisher HQ page.

preparation

Glue or Thread – that is the question

So lets talk English Paper Piecing (EPP) Basting! There are two options when it comes to basting – glue or thread.  Recently I ran a quick survey via Instagram asking people what technique they typically used and of the over 700 respondents 47% thread basted and 53% glue basted.  So it seems both options are popular.  I actually use either technique depending on the shape (smaller than 1 inch hexies I tend to glue baste) and my time (slow stitching equals thread basting).

Before you start basting you will need to cut out your fabric.  I find using a plastic template is ideal because it allows me to fussy cut and ensures I don’t waste too much fabric by cutting a wider then needed seam allowance.  Once you have your fabric cut out, centre your hexie paper on the wrong side of the fabric and now you can either glue baste or thread baste

Glue Basting

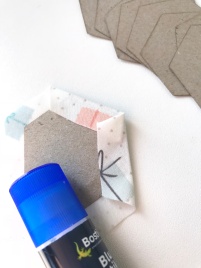
  1. Run a thin line of glue a
    glue 1

    Fig 1.

    long one edge of the paper – the thinner the better so you don’t end up with too much glue to stitch through nor are you papers hard to remove. (Figure 1)

  2. Fold the fabric against the glue and press down
  3. Repeat along each side making sure your fabric is laying flat against the edge of the paper to give you a nice sharp fabric edge. (Figure 2)
  4. To assist with the glue and sharp edge weigh down you hexie with a book or something heavy until the glue dries.
glue2

Fig 2.


Thread Basting

  1. Thread your needle (I use either a size 10 or 11 needle) with your cotton.  I prefer to thread baste with Aurifil 50wt thread as it has a good weight and glides through the tiny eye of the needles without bending or fraying.
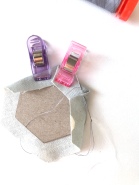
  2. Fold over one side of your fabric over the edge of the paper piece, then fold the fabric on the next side also over the edge of the a paper (the direction doesn’t matter but I do find my shapes nest better when they are all stitched in the same direction). Hold in place with 2 clips.
  3. Fold over the fabric on the next side and stitch through the folded edge ensuring you go through both side of fabric. (You can also stitch directly down through the fabric and through the paper however I find this method blunts my needle faster and also makes holes through my papers making wear a bit quicker – I try and get at least two projects out of a set of hexie papers)
  4. Go back through the fabric again (making sure you don’t pull your thread completely through) and this should hold the fabric and thread in place. (Figure 3)

    thread2

    Fig 3.

  5. Fold over the fabric over the next side and hold in place with you finger.  Stitch through the folded fabric stitching towards your original entry spot.  Your thread should now be laying flat against the fabric, holding the fabric in place.
  6. Repeat step 5 for the remaining edges
  7. Finish the final side by stitching through the fabric directly next to the original looped knot on step 4.  (Figure 4)


thread5

Fig 4.

The method you choose is purely up to you, as you stitch up your flowers you won’t notice which technique you used and in fact many of my flowers have used hexies that have been glue and thread basted.

backofhexies

While thread basting does take extra time, it protects your papers more, its makes removing papers easier and you don’t end up with sticky fingers.  However the speed you can make glued basted hexies is also perfect if you are time poor and want to spend more time stitching your hexies together- which incidentally Jodi has written a brilliant blog all about.  Who knew thread was directional!

final1

I am loving seeing all the variations of hexie flowers already being created under the #kingfisherstitchalong and #kingfisherquilt hashtags.  And can’t wait to see all the EPP creativity over the coming 8 weeks.

Happy Basting!

Ange

Pretty Handmades Blog Tour

I am so excited to help celebrate the launch of the  Pretty Handmades a new Tuva Publishing release by Lauren from the studio for pretty stitches Molly and Mama.

Lauren and I have become good friends over the past year or year and I’m continually inspired by her perfect tiny hand stitches and the way she expertly combines felt with fabric.
PHcover
Lauren’s book Pretty Handmades is as pretty as it is inspirational especially as Lauren has a way of adding the perfect amount of detail to truly make a handmade project unique and precious.

I decided to make two projects from the book for the tour (and look forward to making my way through the entire book especially as Christmas is only a few months away).

Processed with MOLDIV

The first project I made was the Garden Path mini quilt. In the book Lauren has made a gorgeous version using linen and Liberty print fabric. I decided to make the mini for my brand new baby niece so chose to use Little Dolly fabric from Elea Lutz for Penny Rose. I hand stitched the hexies together using 80wt Aurifil thread (which remains my favourite thread for hand piecing). I then hand stitched around each individual hexie with 12wt Aurifil thread. I find this thread has a nice thickness that doesn’t disappear nor overwhelm the print.


Processed with MOLDIV

Lauren embellished her version with the sweetest embroidered ribbon however Idecided to try my hand using felt for the first time. I cut out a felt circle using pinking shears and then cut a slightly smaller fabric piece that I had backed with thermoweb. Applying thermoweb to the wrong side of the fabric meant it becomes like a sticker (when you remove the backing paper) and I ironed the piece to the felt. I then stitched the button to the mini quilt using the 12 wt Aurifil thread and added an extra row of stitches to the entire project.


Processed with MOLDIV
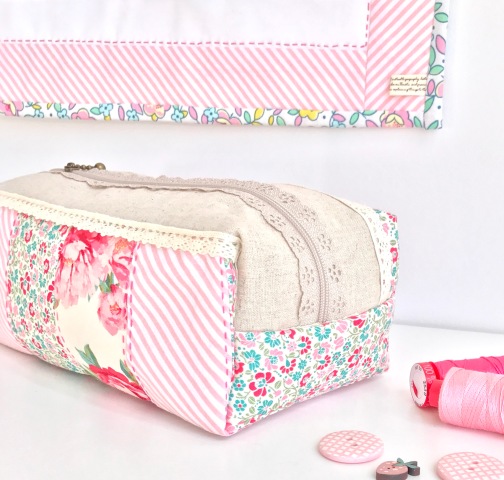
For my second project I made the Posie Patchwork Pouch. I had never made a box pouch before and Lauren’s instructions are so well written I’m confident even someone new to sewing could make this project. I used a combination of linen, sweet orchard stripes from Riley Blake and prints from the latest Tilda release Cottage.

Processed with MOLDIV


zipperclose


I love how Lauren also used a lace zipper for the project. I often buy these pretty lace zippers without a project in mind (and I know from Instagram a lot of other crafters do the same). And now thanks to Lauren’s wonderful book we have the perfect project to get the lace zippers out from our stash and used in a pretty AND useful project.


pouchfar

Thank you so much for stopping by on my stop of the blog tour. Yesterday’s make by Sarah of A Little Happy Place blog has showed how different the Posie Patchwork Pouch can look based on your fabric choice. And I can not wait to see how Lauren’s book has inspired one of my favourite designers Elea Lutz when she features tomorrow. Make sure you also take a moment to stop by Lauren’s blog as she has a full list of blog tour participants and you can also enter to win a signed copy of her book!

Happy stitching

Pretty Handmades Book Showcase

Quilting on the Go Book Tour

Welcome to my stop on the Quilting on the Go book tour!

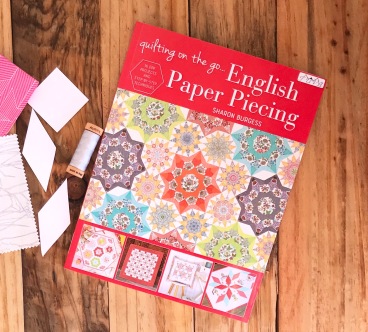
I was super excited when Sharon Burgess from Lilabelle Lane Creations announced on Instagram she was releasing an English Paper Piecing book with Tuva Publishing because her ability to fussy cut and paper piece is incredible.  So you can only imagine my excitement when she asked me to join the book tour celebrating her book, Quilting on the Go, English Paper Piecing!

IMG_7344

I have been practicing English Paper Piecing for the past two years, and I mean practicing.  There is still so much I have to learn but thanks to the fantastic step by step details written by Sharon I learnt quite a few more things within the first few pages.  I particularly liked the information on fussy cutting patterns to create your own new pattern.  I am now looking at fabric prints in a whole new fussy cut light.

IMG_7184

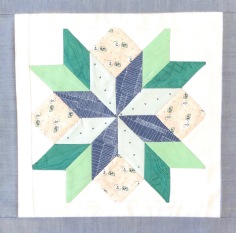
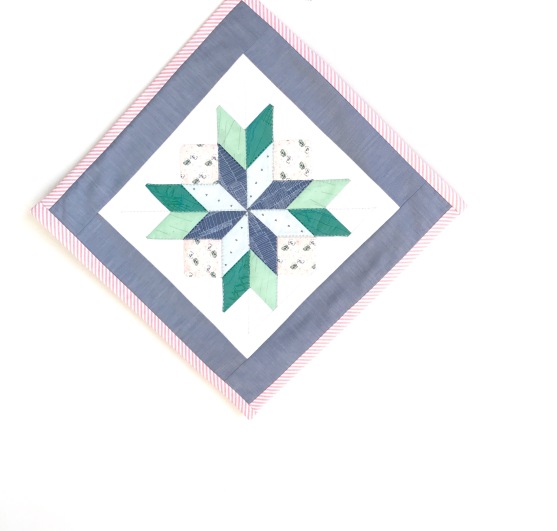
The hardest part of any blog tour is choosing which pattern to showcase.  Sharon’s book features so many gorgeous  blocks as well as projects to use them for.  I choose to make a mini quilt using the block from the Summer Star table runner.

IMG_7630 (1)

With a nod to Sharon’s ability to use and combine colours from all parts of the colour wheel, I decided to move away from my usual pink palette and instead used blues and greens as my main colours.

I hand stitched the paper pieces together using Aurifil thread in 80wt, it is such a fine thread your stitches practically disappear.  I then added hand quilting using various 12wt Aurifil threads including a Green Lana Wool.  It was the first time I had used the woollen Aurifil thread and I loved the texture it added to my block.


IMG_7870


I absolutely adore the final result and will definitely be making a few more Summer Star blocks to decorate my family room wall.

IMG_7915

Thank you so much for stopping by my blog and make sure you visit Sharon’s blog as she is doing a weekly recap of all the projects being completed.  Its a great way to see the various projects in the book while also having a look around Sharon’s inspiring blog.

Happy stitching
Ange


Lovely Little Patchwork Blog Tour

LLP Sew Along Banner

Hi! Welcome to my stop on the Lovely Little Patchwork blog tour!

cover


Lovely Little Patchwork is the brilliant first book published by Kerri Horsley of Lovely Little Handmades for Tuva Publishing. When Kerri  and Tuva Publishing sent me a copy of her book a few months ago I was so excited that within a few hours I had sewn up a cute heart pot holder (you can read all about it in my previous blog post).


Since that time I have made quite a few items from the book including these sweet Back to School Pencil IMG_9194pouches.  If you are nervous about creating with zippers you will love IMG_9526Kerri’s pattern. It is so easy to follow and you can easily hand stitch the zipper in place if you are concerned about using your machine to sew on a zipper. I also know a lot of people who love the look of lace zippers but struggle to find a pattern to use them with, so this is a perfect way to finally experiment with them.

To celebrate my turn on the Lovely Little Patchwork blog tour I made a new project from the book – the Ice Skating Girl cushion. I love making cushions, if you have seen my Instagram account this won’t come as any surprise. Because if like me you are new to sewing quilt blocks, a cushion is a happy medium between a small project like a pot holder and a large project like a quilt.

IMG_2002

This is the first time I made half square triangles and quarter square triangles but thanks to the books glossy pictures and comprehensive IMG_1981instructions the only reason I needed to do any unpicking was when I changed my mind about a fabric choice. And the fact that the triangles are made from pieces no larger than a 5 1/2 inch square means its also a perfect project for using up your scraps.

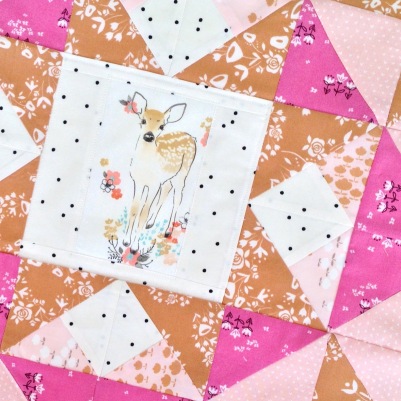
I used fabric from a range of collections and love how the block can look so different depending on where you place your stronger colours and prints. In the book Kerri gives you details and a pattern for embroidering an image in the centre (hence the name Ice Skating Girl). However I had a small piece of  Hawthorne Threads fawn fabric that I wanted to use for a special project like this and it worked perfectly with my recent fabric purchase of Amy Sinibaldi’s  Playground collection. I also used my favourite blender from Dear Stella Tiny Hearts in Petal and an older collection by Bonnie Christine FireFly Whisper to complete the look. I quilted the block using a 1/4 inch seam around each triangle and as result I have a soft squishy pillow large enough for two family members to snuggle against.

IMG_2032

If you are looking for a book that teaches you a range of techniques to make both pretty and useful items for all ages then this book is ideal!  And the best part is the blog tour allows you to see lots of the items featured in Lovely Little Patchwork, so make sure you pop over to the other blogs to be inspired!

There is a fantastic table of all those featured in the blog tour but unfortunately I can’t publish tables, instead you can view the complete list of all the wonderful makers on the first blog featured – Amanda from Jedi Craft Girl.  You can also use the hashtag #lovelylittlepatchworkblogtour on Instagram to view the beautiful photos.

And tomorrow is Sedef’s from Down Grapevine Lane turn on the tour, and you can guarantee her make is going to be truly inspiring.  I can’t wait to see it!

Happy creating!

lovely little patchwork 2


Apple Farm Blog Hop

Hi! Welcome to my blog and my turn on the Apple Farm Blog Hop for Elea Lutz’s latest collection for Riley Blake Designs.

IMG_1670Ok let’s be honest Elea is yet to create a collection that I don’t absolutely adore so no real surprise how much I love this collection. But seriously who wouldn’t! With its pretty
pops of colour, pretty ginghams, sweet apples and adorable critters it has been so much fun to create with (especially as our Australian winter has been filled with many gloomy grey days).


The arrival of Apple Farm coincided with the arrival of my first great niece. And so I set to create a few special gifts for her. For me one of the greatest quilting honours I can have is for a designer IMG_1279to ask me to work with their designs. I wanted to make a truly special quilt that honoured the traditional side of quilting whilst celebrated the vibrant colours of Apple Farm. So after seeing so many gorgeous Lucy Boston blocks posted on Instagram I decided to give them a go. Sewing these blocks was quite a challenge because as well as fussy cutting the pieces, fabric placement can have a huge impact on the look of the block. (The nice IMG_1256part about these blocks is they only use one shape – elongated hexies – and as it only takes 24 papers to make a block  you don’t have to make a huge financial investment to give them a go.)


IMG_1740

After two weeks of solid hand stitching (and many moments thinking I would never finish)completed my great niece’s baby quilt. I hand stitched everything except the sashing between the blocks and after hanging it on the line to dry I couldn’t believe the effect the winter sun had shining through my hand pieced blocks.


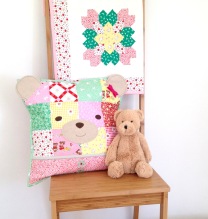
I also made my great niece a cute bear pillow to match her quilt. I used the pattern from Amy IMG_1724
Sinibaldi’s book Sweetly Stitched Handmades. My hope is that my niece and her baby daughter use this teddy pillow to snuggle with, lay on, read books next to and it becomes all squishy and well loved like the ones I made my girls


It feels so special to share my quilting with my family and to create pieces that are designed to be loved by children and their parents. I am sure that is what Elea had in mind when she designed this collection and the fact that I have this fabric because I was asked by Elea to create with it makes these handmade gifts that much sweeter.

IMG_1674

I hope I have inspired you to try a technique, create with this collection and continue enjoying the blog hop. Make sure you check out Lauren’s creations at Transient Art and tomorrow have a look at Jessica from Euphoria Jessica and Kristyne from Pretty by Hand blog posts.

Strawberry Biscuit Blog Hop

When Elea Lutz contacted me and asked if I wanted to join the Strawberry Biscuit blog hop I was so excited (and fairly nervous).  This collection was a firm favourite the moment I saw it on her Instagram feed.  IMG_9353

I knew that with such pretty and cheery fabric I wanted to make
something for my daughters. I then thought about why I adored this collection so much. It wasn’t just the fact it features sweet baking kitties, singing blue birds, tiny flowers and a divine cheater print perfect for making 1 inch hexies.

IMG_9396

It was Elea’s perfect eye for details and colours. Her beautiful illustrations are reminiscent of my favourite vintage prints and I find each and every piece of the collection sweet and inspiring. Suddenly the answer came to me – for this arts and craft obsessed family I would make a children’s travelling art case!

A ‘go anywhere’ art case would be a great way to display the sweet prints, as well help encourage my daughters to keep creating, no matter where they are (who knows, maybe one day they will be fabric designers!).

Open art case


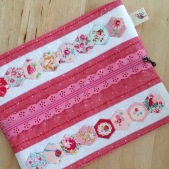
I couldn’t find an art case pattern so instead I came up with a simple design that I then embellished with fabric stamps, hexies and a fussy cut quilt block. I even took the cheater print and turned it slightly so that the squares became diamonds! Such a simple twist and the result is so sweet


Below I have a little step by step tutorial on how I made the case. You can make the case as simple or as intricate as you like.  I have a place for pencils, a pouch for treasures and a section for an art pad.  I encourage you to make the case your own by adding the little touches you love creating and as a result it is sure to be a cherished piece that encourages the next generation of creators.

IMG_9398
There have been so many amazing bloggers featured in this blog hop and tomorrow is no exception.  Make sure you have a look at the projects by Megan from Dolly Henry and Stacy from Farm Road Quilts you are guaranteed to be inspired by what they have made with Strawberry
Biscuit!

Art Case


Travelling Art Case Tutorial

Fabric requirements

Inner Cover
Cover – 12 1/2 inches by 21 1/2 inchesIMG_9355


Pencil Section

Outer Fabric – 7 1/2 inch by 5 1/4 inch
Lining – 7 1/2 inch by 5 1/4 inch

Pouch with Flap
Outer Fabric – 7 1/2 inch by 3 1/2 inch
Lining – 7 1/2 inch by 3 1/2 inch

Flap 7 1/2 inch by 3 1/4 inch
Flap Lining 7 1/2 inch by 3 1/4 inch

Notebook Section
Outer Fabric – 9 1/4 inch 9 1/4 inch
Lining – 9 1/4 inch 9 1/4 inch

Outer Cover
Cover – 12 1/2 inches by 21 1/2 inches
Batting (I used a stiff bag batting) – 12 inches by 21 inches
Handles – 2 x (2 inch by 8 inch)

Instructions

Please note these are the basics for preparing the case. Remember to personalise it!

Inner Cover

  1.  Sew each of the section and pouch pieces to its corresponding lining by placing the two pieces right side together. Sew around each piece using a 1/4 seam and leaving a 1 inch gap to allow you to turn the pieces out. Turn them out and then press.
  2.  Lay out your inner cover right side facing up. On the upper left side of the cover lay your pouch section and then the flap piece slightly above the pouch section. Below the pouch, position the pencil section (Hint: remember the pencils will stick out the top so you need to make sure there is enough space between the bottom of the pouch and the top of the pencil section).
  3. Place the notebook section on the right side of the cover making sure you place it low enough that your notebook won’t stick out of the top of the case.
  4. Check that you are happy with the layout of each of your sections, and that they are far enough away from the outer edge that they won’t be caught up in the hem when you sew the outer and inside cover together.
  5. You will now sew each section in place to the inner cover. For all pieces (except the pouch flap) top stitch along the two short sides and along the bottom. You will then top stitch just along the top of the pouch flap.
  6. You are now going to make the slots for the pencils to go into. We are using quite IMG_9098thick pencils so I measured 1 inch intervals along the length of pencil section. (Hint: if you are using thinner pencils you might be able to fit in extra pencils). I then top stitched a straight line down each inch interval (from the top to the bottom).
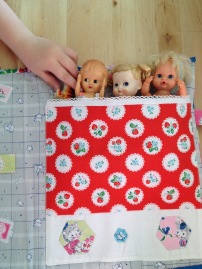
  7. Depending on what you are putting in your pouch with a flap you can either add snaps or just leave it as is.

Outer Cover

  1. Quilt the Outer cover to the batting however way you wish. if you want to keep it really simple you could just sew 1/4 inch around the edge of the batting so that it is secure to the front cover.
  2. Take the two strips of fabric for the handles. Take the fabric and fold in in half length ways so it measures 1 inch by 8 and then press. Open up the strip and then fold each 8 edge so that they meet at the centre fold. Now fold the entire thing at the original fold so you end up with a 1 inch by 8 inch strip with concealed edges. Repeat for the other strip. Then top stitch 1/8 inch in down the length of of each strip along both sides.
  3. Now we are going to attach the handles to the outside cover. Measure 3 inches down and attach the handle shorter (1 inch) edge to the cover. Measure 7 1/12 inches down from the top and attach the other shorter edge. You should now have a handle! (Hint: make sure the handle is laying against the cover so that it is out of the way when you sew the front and back cover together). Repeat on the other side for the other handle.

Final Construction

  1. You are now going to sew the outer cover to the inside cover. Lay the two cover right side together and pin. Sew around using a 1/4 inch seam and leaving a 4 inch gap at the bottom to turn the case out.
  2. Turn out the case and press, making sure you push out each corner.
  3. Hand sew or machine stitch the opening closed
  4. Fill up your case with lots of fun bits and pieces! And in our case remove all those art pieces and replace them with your tiny vintage dolls and their pet dinosaur. Enjoy!IMG_9343

A Patchwork Coin Purse

IMG_8773I recently discovered 3/8 hexies,  fussy cutting and paper piecing tiny pieces can be very time consuming so I really wanted to find a great way to display the final piece.  And for me a patchwork coin purse was the perfect way!

I used a 4 inch sew in frame, which I personally find a lot easier to IMG_8563work with compared to the glue in frames.  You don’t have to worry about glue sticking to your frame (or fabric) and I simply use sticky tape to can hold the fabric in place while I sew it into the frame (I even just sew through the tape and then remove the tape once I have finished).

If you haven’t tried making a coin purse you should definitely give it a go – they make a perfect patchwork gift that can be used everyday!

IMG_8785

Strawberry Biscuit Zipper Pouch

One of my favourite Fabric Designers Elea Lutz will shortly be releasing a new fabric collection, Strawberry Biscuit.  To me the collection is reminiscent of the Golden Books I had as a child, with kittens in bows, harmonising blue birds and sweet strawberries, its almost guaranteed to inspire.  And if you haven’t seen Elea’s work you should definitely have a look at her website.

Strawberry Biscuit is being released in Australia in May (and in even better news one of my favourite fabric stores Ministry of Fabric will be selling it!!)  However thanks to the generosity of one of my Instagram friends, who won a pre release bundle in a recent
giveaway, I managed to get my hands on some of the prints last week.  And it did not disappoint, it inspired me so much I actually tackled one of my sewing phobias – a zipper – to make a little zip pouch.

IMG_8591

Adding in fabric at either ends of the zippers prevents it disappearing into the edges of the pouch

To add in the zipper without it disappearing into the corners of the pouch, I used this tutorial which explained how to add in a piece of fabric at either end of the zipper to essentially extend the zipper length.  And ta da a completed strawberry zipper pouch.

Ohh and if you love fussy cutting hexies the cheater print in the collection makes perfect fussy cutting for 1/2 inch hexies!


IMG_8644

Creating Hexies

hexi cushion 1

Liberty Of London hexie cushion.

I first tried English Paper Piecing a year ago, I bought pre-cut Liberty of London fabric hexagons (or hexies) from Alice Caroline. and hexagon papers from my local quilt store. It then took me around 2 months, while I watched tv in the evenings, to baste the fabric to the individual papers and then sew the 50 hexies together and the result was a cute little pillow and a new obsession.

IMG_6444

1/2 inch hexies

Since then I have made more hexies than I can count and my favourite thing to do now is cut my hexagons so they feature a cute image – otherwise known as fussy cut hexies.  With a bit practice (and a clear plastic hexagon template) you can perfectly cut your hexagons so they make the most of your fabric (even the smallest scrap of fabric such as these 1/2 inch hexies).