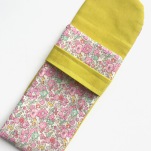
A wrote up a tutorial for a cute glasses pouch about a year ago but never got around to posting it! I love sewing projects that are pretty and practical so I hope you like it as much as I do. For my pouches I have used Liberty Prints (Betsy 19b and Strawberry Thief 19a) and Aurifil floss.

This pattern is a perfect use of Ava and Neve’s Fat 1/8 pieces (in fact one Fat 1/8 can be used for the covers of three banded glasses pouch) and would make a lovely quick gift.

Requirements
4 x 18 inch piece of fabric for the outer case (if you are using a fat 1/8 with a directional print you will need to cut two pieces of 4 x 9 1/14 inch and stitch them together along the shorter edge to make one 4 x 18 piece)
4 x 18 inch piece of fabric for the case lining
Floss or 12 inch weighted thread in matching colour to the case lining
4 x 4 ½ inch piece for the band
4 x 18 inch of fusible interfacing (or you could use batting but would need to either quilt or spray baste it to the wrong side of the case outer)
Instructions
- Fuse your batting or interfacing to the outer case fabric (Fig 1.)
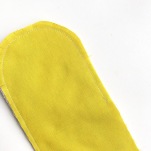
- Use a bowl or similar to draw a curve on one of the 4 inch ends of both the outer case and lining strips of fabric (Fig 2.)
- Using scissors or a rotary cutter cut around the curved line you have drawn
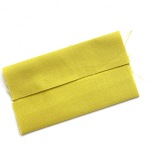
- Take your piece of fabric for the band and fold it in half along the 4 inch length, finger press then unfold (Fig 3.). Using the crease line fold your raw edges along the 4 inch sides together and then fold in half again. The raw edges along the 4 1/2 inch side will now be concealed, stitch along both edges of the 4 ½ inch side using a ¼ inch seam (Fig 4.).
- Take your strip for the band (now measuring 2 inches by 4 ½ inches) and position it 1 ½ inches from the bottom of the straight 4 inch edge of your external fabric (right side facing up). Using a 1/8 inch seam stitch to the edges of the external fabric (making sure to position the edges to align as the band is ½ inch longer however you need the room to slip the flap into on the finished case (Fig 5.).
- Lay the outer case and case lining pieces right sides together and using a ¼ seam stitch together. Leave a 1 inch opening along the longer side to turn out the case (Fig 6.).
- Using your scissors snip around the curved edges making sure you don’t cut through your stitching. This will reduce the bulk in you seam and assist with the curved edge sitting flatter
- Using the 1 inch gap turn out your case completely and press.
- Stitch the gap closed using a whip stitch
- Fold the straight end up 6 ½ inches and clip in place (Fig 7.).
- Using your floss or 12 weighted thread in matching colour to your case lining whip stitch the edges in place. Being careful to stitch only through the internal cover (Fig 8.).
- Press case again
- Add any buttons or embellishment you like.


