
Welcome to my turn on the lovely High Tea blog hop! High tea for Lecien is Jera Brandvig’s debut collection and oh my goodness its a truly sweet collection. Even the print names are yummy, with colourways like Fig Red, Butter Cream and Brown Sugar two name a few.
I wanted to use the fabrics in a way that would showcase the divine soft colours and pretty high tea inspired prints. I knew what ever I created it definitely needed to feature fussy cutting. I actually made this little dresden before I had a plan on what to use it for.

After much consideration I decided to make a treat for myself, by making a sweet tea cosy featuring Jera’s prints and linen. Growing up my Grandma always crocheted tea cosies for the family however since her passing and my inability to crochet that tradition kind of stopped. And when you realise how cute they can be with fabric like High Tea and how easy they are I’m pretty sure a tea cosy will be added to your handmade Christmas gift repertoire.
I followed the fantastic free tutorial by Jesse at the  Messy Jesse blog. I did waver slightly after step four. I skipped step 5 and instead separately sewed bias binding to the bottom edges of the two sides of the tea cosy. Then I placed the tea cosy sides wrong sides together and sewed around the curved edge with a 1/4 inch seam. You should now have a tea cosy (albeit with a messy edge). However by adding the bias binding to this curved edge you will conceal those messy edges.

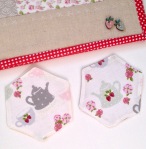
Of course if I am going to have a tea cosy it only seams fitting to have matching coasters. So I used Cheri’s from the blog Tinker With This free hexie coaster pattern to make two perfectly sweet and matching High Tea coasters.
I think this tea cosy and coaster set would make a perfect gift (especially in High Tea fabrics) when combined with your favourite tea and handmade biscuits. (or shop bought biscuits – if like me you are a maker not a baker 🙂

Thank you for taking the time to read my post! And great news the blog hop continues tomorrow with the very talented quilter Peta from She Quilts A Lot working with this pretty collection.

 Ok let’s be honest
 to ask me to work with their designs. I wanted to make a truly special quilt that honoured the traditional side of quilting whilst celebrated the vibrant colours of Apple Farm. So after seeing so many gorgeous Lucy Boston blocks posted on Instagram I decided to give them a go. Sewing these blocks was quite a challenge because as well as fussy cutting the pieces, fabric placement can have a huge impact on the look of the block. (The nice
  part about these blocks is they only use one shape – elongated hexies – and as it only takes 24 papers to make a block you don’t have to make a huge financial investment to give them a go.)


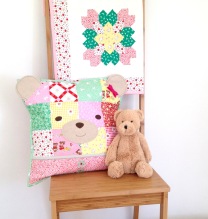
 The Posy Garden prints are so pretty so I decided to use it for a project I had long promised my youngest daughter – a tooth fairy pillow… well actually a tooth fairy wall hanging. My eldest has a pillow but with months between tooth fairy visits it can be quite hard to find her tiny pillow just before bedtime. So instead of a pillow I made a tooth fairy wall hanging. That way when not tucked under her pillow waiting for a visit she can have it hanging on her wall above her bed. And when you use the super cute tooth fairy quilt block pattern from Elea Lutz’s book
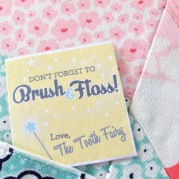


