
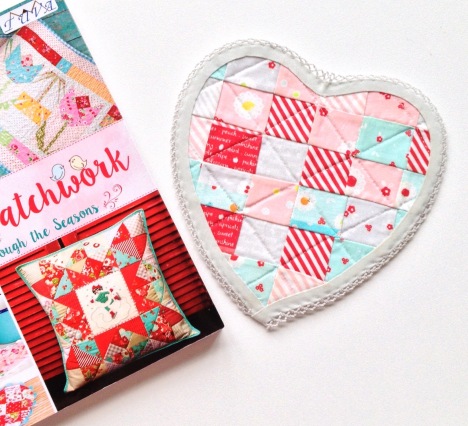
When Elea Lutz contacted me and asked if I wanted to join the Strawberry Biscuit blog hop I was so excited (and fairly nervous). This collection was a firm favourite the moment I saw it on her Instagram feed. 
I knew that with such pretty and cheery fabric I wanted to make
something for my daughters. I then thought about why I adored this collection so much. It wasn’t just the fact it features sweet baking kitties, singing blue birds, tiny flowers and a divine cheater print perfect for making 1 inch hexies.

It was Elea’s perfect eye for details and colours. Her beautiful illustrations are reminiscent of my favourite vintage prints and I find each and every piece of the collection sweet and inspiring. Suddenly the answer came to me – for this arts and craft obsessed family I would make a children’s travelling art case!
A ‘go anywhere’ art case would be a great way to display the sweet prints, as well help encourage my daughters to keep creating, no matter where they are (who knows, maybe one day they will be fabric designers!).

I couldn’t find an art case pattern so instead I came up with a simple design that I then embellished with fabric stamps, hexies and a fussy cut quilt block. I even took the cheater print and turned it slightly so that the squares became diamonds! Such a simple twist and the result is so sweet
Below I have a little step by step tutorial on how I made the case. You can make the case as simple or as intricate as you like. I have a place for pencils, a pouch for treasures and a section for an art pad. I encourage you to make the case your own by adding the little touches you love creating and as a result it is sure to be a cherished piece that encourages the next generation of creators.

There have been so many amazing bloggers featured in this blog hop and tomorrow is no exception. Make sure you have a look at the projects by Megan from Dolly Henry and Stacy from Farm Road Quilts you are guaranteed to be inspired by what they have made with Strawberry
Biscuit!

Travelling Art Case Tutorial
Fabric requirements
Inner Cover
Cover – 12 1/2 inches by 21 1/2 inches
Pencil Section
Outer Fabric – 7 1/2 inch by 5 1/4 inch
Lining – 7 1/2 inch by 5 1/4 inch
Pouch with Flap
Outer Fabric – 7 1/2 inch by 3 1/2 inch
Lining – 7 1/2 inch by 3 1/2 inch
Flap 7 1/2 inch by 3 1/4 inch
Flap Lining 7 1/2 inch by 3 1/4 inch
Notebook Section
Outer Fabric – 9 1/4 inch 9 1/4 inch
Lining – 9 1/4 inch 9 1/4 inch
Outer Cover
Cover – 12 1/2 inches by 21 1/2 inches
Batting (I used a stiff bag batting) – 12 inches by 21 inches
Handles – 2 x (2 inch by 8 inch)
Instructions
Please note these are the basics for preparing the case. Remember to personalise it!
Inner Cover
- Sew each of the section and pouch pieces to its corresponding lining by placing the two pieces right side together. Sew around each piece using a 1/4 seam and leaving a 1 inch gap to allow you to turn the pieces out. Turn them out and then press.
- Lay out your inner cover right side facing up. On the upper left side of the cover lay your pouch section and then the flap piece slightly above the pouch section. Below the pouch, position the pencil section (Hint: remember the pencils will stick out the top so you need to make sure there is enough space between the bottom of the pouch and the top of the pencil section).
- Place the notebook section on the right side of the cover making sure you place it low enough that your notebook won’t stick out of the top of the case.
- Check that you are happy with the layout of each of your sections, and that they are far enough away from the outer edge that they won’t be caught up in the hem when you sew the outer and inside cover together.
- You will now sew each section in place to the inner cover. For all pieces (except the pouch flap) top stitch along the two short sides and along the bottom. You will then top stitch just along the top of the pouch flap.
- You are now going to make the slots for the pencils to go into. We are using quite
 thick pencils so I measured 1 inch intervals along the length of pencil section. (Hint: if you are using thinner pencils you might be able to fit in extra pencils). I then top stitched a straight line down each inch interval (from the top to the bottom).
 - Depending on what you are putting in your pouch with a flap you can either add snaps or just leave it as is.
Outer Cover
- Quilt the Outer cover to the batting however way you wish. if you want to keep it really simple you could just sew 1/4 inch around the edge of the batting so that it is secure to the front cover.
- Take the two strips of fabric for the handles. Take the fabric and fold in in half length ways so it measures 1 inch by 8 and then press. Open up the strip and then fold each 8 edge so that they meet at the centre fold. Now fold the entire thing at the original fold so you end up with a 1 inch by 8 inch strip with concealed edges. Repeat for the other strip. Then top stitch 1/8 inch in down the length of of each strip along both sides.
- Now we are going to attach the handles to the outside cover. Measure 3 inches down and attach the handle shorter (1 inch) edge to the cover. Measure 7 1/12 inches down from the top and attach the other shorter edge. You should now have a handle! (Hint: make sure the handle is laying against the cover so that it is out of the way when you sew the front and back cover together). Repeat on the other side for the other handle.
Final Construction
- You are now going to sew the outer cover to the inside cover. Lay the two cover right side together and pin. Sew around using a 1/4 inch seam and leaving a 4 inch gap at the bottom to turn the case out.
- Turn out the case and press, making sure you push out each corner.
- Hand sew or machine stitch the opening closed
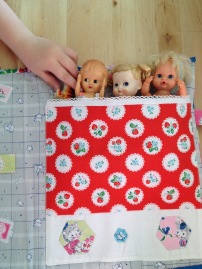
- Fill up your case with lots of fun bits and pieces! And in our case remove all those art pieces and replace them with your tiny vintage dolls and their pet dinosaur. Enjoy!
 One of my favourite bloggers,
  ).
).

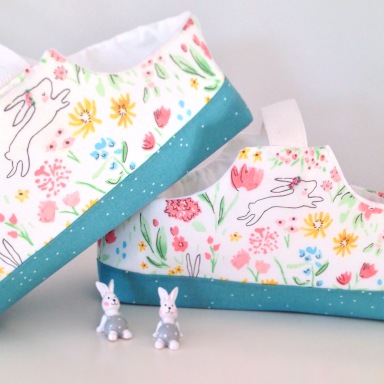 was recently searching for a simple (and free) pattern to make baskets to give as Teacher thank you gifts. And found this perfect
  The baskets turned out really well, and I even added a couple of french knots to create a little floral crown on the Sommer leaping bunny. And here’s a hint – as well as being a cute little basket they also make the perfect bassinet for a teddy or doll.